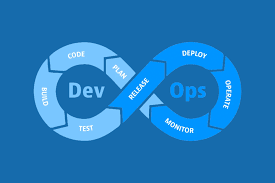
Setting up Dev, Stage, and Prod environments ensures a robust CI/CD pipeline and enables smooth development, testing, and deployment processes. This article explains how to configure these environments using AWS Elastic Beanstalk and Bitbucket, with step-by-step guidance and examples.
Prerequisites
- AWS Account with permissions to manage Elastic Beanstalk.
- Bitbucket Repository for your application code.
- AWS CLI installed and configured.
- Elastic Beanstalk CLI (EB CLI) installed.
- Application code ready to deploy.
Step 1: Create Elastic Beanstalk Environments
Elastic Beanstalk simplifies managing multiple environments (Dev, Stage, Prod).
1.1 Initialize Elastic Beanstalk
First, initialize your Elastic Beanstalk application in the root directory of your project.
eb init
- Select your AWS region.
- Choose an existing application or create a new one.
- Configure default platform (e.g., Node.js, Python, etc.).
1.2 Create Environments
Create separate environments for Dev, Stage, and Prod:
# Development environment
eb create dev-env --env-name dev-env --cname dev-myapp

# Staging environment
eb create stage-env --env-name stage-env --cname stage-myapp

# Production environment
eb create prod-env --env-name prod-env --cname prod-myapp
Each environment will have its unique URL, such as:
- Dev:
dev-myapp.us-west-2.elasticbeanstalk.com - Stage:
stage-myapp.us-west-2.elasticbeanstalk.com - Prod:
prod-myapp.us-west-2.elasticbeanstalk.com
Step 2: Configure Bitbucket Pipeline
Bitbucket Pipelines is a CI/CD service that automates deployments. Add the bitbucket-pipelines.yml file in your project root:
Example bitbucket-pipelines.yml File
image: amazonlinux

pipelines:
  branches:
    dev:
      - step:
          name: Deploy to Dev
          script:
            - pip install awsebcli --upgrade
            - eb init -p python-3.8 myapp --region us-west-2
            - eb use dev-env
            - eb deploy

    staging:
      - step:
          name: Deploy to Staging
          script:
            - pip install awsebcli --upgrade
            - eb init -p python-3.8 myapp --region us-west-2
            - eb use stage-env
            - eb deploy

    master:
      - step:
          name: Deploy to Production
          script:
            - pip install awsebcli --upgrade
            - eb init -p python-3.8 myapp --region us-west-2
            - eb use prod-env
            - eb deploy
Breakdown
branches: Defines deployment behavior for each branch.devbranch deploys to the Dev environment.stagingbranch deploys to the Stage environment.masterbranch deploys to the Prod environment.
eb use: Switches to the specified environment.eb deploy: Deploys the code to Elastic Beanstalk.
Step 3: Configure Environment Variables
Each environment may require specific configurations like API keys, database connections, etc. Set environment variables using the AWS Management Console or CLI.
Using AWS CLI
eb setenv KEY=VALUE OTHER_KEY=OTHER_VALUE
Run this command for each environment (e.g., dev-env, stage-env, prod-env).
Step 4: Test and Verify Deployments
- Push Code: Push code to the relevant branch (
dev,staging, ormaster) in Bitbucket. - Pipeline Trigger: Verify that the Bitbucket Pipeline triggers and deploys the application to the appropriate environment.
- Access URLs: Test each environment using its respective Elastic Beanstalk URL.
Step 5: Manage Environment Differences
To ensure reliable testing and deployment:
- Use different databases or services for each environment.
- Implement environment-specific logging or monitoring.
Example Use Case: Node.js App Deployment
Assume you have a simple Node.js app. The process remains similar:
- Configure Elastic Beanstalk for Node.js.
- Update
bitbucket-pipelines.ymlwithnode:14as the image. - Adjust deployment scripts accordingly.
Sample Scripts for Node.js
npm install
npm run build
eb deploy
Conclusion
Setting up Dev, Stage, and Prod environments with AWS Elastic Beanstalk and Bitbucket ensures a streamlined development lifecycle. With proper CI/CD practices, this setup enables safe testing, robust deployments, and efficient teamwork.
